Expert Articles for Smarter Car Care
ADAS Warning Lights After Accident Repair: Why Sensor Calibration May Be Required
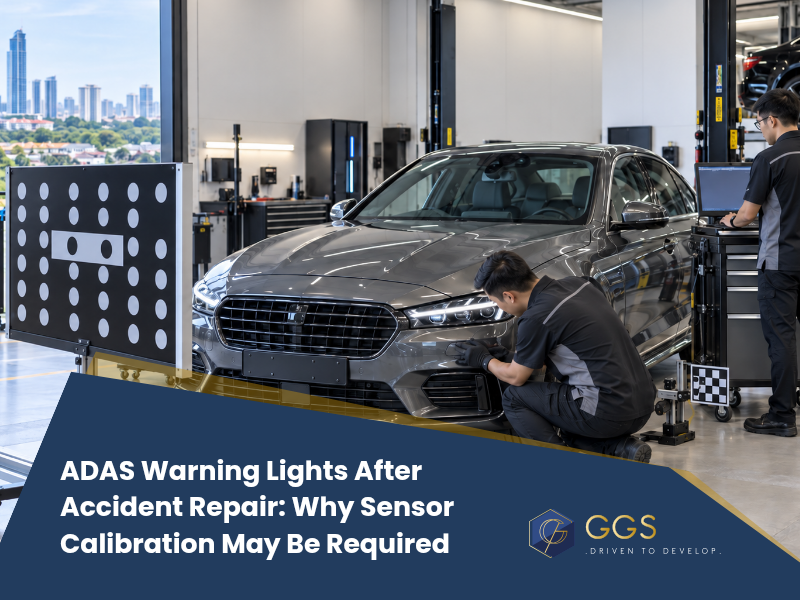
Table of Contents
An ADAS warning light or driver-assistance system message appearing after accident repair does not automatically mean that a sensor has failed. The original collision may have damaged a sensor, bracket or wiring; the repair may have disturbed a calibrated component; or post-repair diagnostics may reveal a fault that was already present.
Modern vehicles use radar, cameras, ultrasonic sensors and vehicle-reference data to support functions such as adaptive cruise control, automatic emergency braking, lane assistance, blind-spot monitoring and parking assistance. If these components or their mounting positions are affected during collision, bumper, body, suspension or glass repair, the vehicle may require further diagnosis and, in some cases, manufacturer-specified calibration.
The correct workshop approach is therefore:
identify the affected system → diagnose the cause → inspect mounting and vehicle geometry → check the applicable repair procedure → calibrate only when required → verify system operation
Why ADAS Warnings Can Appear After Collision Repair
ADAS components are often installed in areas that are directly exposed during an accident.
A front impact may affect radar mounted behind the bumper or grille. Rear collision damage may disturb blind-spot radar or parking sensors. Windscreen replacement can affect forward-facing cameras, while suspension or steering repairs may change vehicle geometry or steering reference data.
There are generally three possibilities when an ADAS warning appears after repair:
The Collision Caused the Fault
The impact itself may have damaged:
- a radar sensor;
- a camera;
- wiring;
- connectors;
- brackets;
- body structures supporting the sensor.
The Repair Disturbed the System
A sensor can be electrically healthy but no longer sit in exactly the same position after removal, bumper replacement or structural repair.
This is particularly important because some sensors depend on very precise aiming.
The Repair Process Revealed an Existing Fault
Electronic scanning or system initialization may expose stored faults that were not obvious before the vehicle entered the workshop.
For that reason, timing alone does not prove that the repair itself caused the warning.
Which ADAS Components Can Be Affected?
Front Radar Sensors
Front radar commonly supports adaptive cruise control, forward collision warning and automatic emergency braking.
It may be mounted behind the bumper or grille. A frontal impact, grille replacement, bumper removal or damaged bracket may affect its position.
The critical question is not simply:
Does the radar communicate with the vehicle?
It is also:
Is the radar still aimed from the correct reference position?
Forward-Facing Cameras
Forward-facing cameras are commonly positioned near the upper windscreen and may support lane recognition, road-sign detection and forward-object monitoring.
Windscreen replacement, pillar repair or structural work can therefore make camera calibration requirements relevant.
Blind-Spot Radar Sensors
Blind-spot and rear cross-traffic systems often use radar positioned around the rear corners of the vehicle.
Rear bumper damage, quarter-panel repair or disturbed mounting brackets can affect these systems even when the radar unit itself is not visibly damaged.
Parking Sensors and Surround-View Cameras
Parking sensors should not automatically be grouped with radar calibration.
Ultrasonic sensors may instead suffer from:
- incorrect orientation;
- damaged retainers;
- wiring faults;
- poor connector contact;
- physical damage;
- incorrect installation.
Surround-view cameras can also be affected when mirrors, grilles, tailgates or bumpers are removed or replaced.
Depending on the vehicle, initialization or calibration procedures may apply, but the workshop should not assume that every parking-system fault is a calibration problem.
Why Bumper and Body Repairs Can Affect ADAS
A modern bumper can support much more than exterior bodywork.
It may contain:
- radar units;
- ultrasonic sensors;
- wiring;
- sensor brackets;
- cameras;
- electronic modules.
A scratched bumper and a bumper involved in a structural impact are therefore not equivalent repairs.
The workshop should first determine whether the repair area contains ADAS components and whether any of those components or mounting points were removed, replaced or disturbed.
Sensor Mounting Brackets Matter
One of the most important post-collision checks is the sensor mounting structure.
A radar unit can be electronically functional while sitting on a bracket that has been slightly bent or incorrectly installed.
That creates an important diagnostic relationship:
sensor healthy + bracket incorrect = sensor aim may still be wrong
Calibration should not be used to compensate for a damaged or incorrectly positioned mounting structure.
Warning Light Does Not Automatically Mean Sensor Failure
An ADAS warning may be caused by many different problems.
Possible causes include:
- sensor failure;
- damaged wiring;
- connector faults;
- mounting-position errors;
- incorrect installation;
- unresolved diagnostic trouble codes;
- control-module faults;
- calibration not completed;
- incorrect vehicle geometry.
This is why replacing a sensor immediately after seeing a warning light can be the wrong repair decision.
A diagnostic trouble code should be treated as evidence that guides further testing, not as automatic proof that the named component must be replaced.
Equally, the absence of a warning light does not prove that every ADAS component is correctly aligned. Some repair procedures require calibration because a sensor or reference point has been disturbed, even if no dashboard warning is present.
When May ADAS Calibration Be Required?
Calibration requirements vary by vehicle, system and repair procedure.
A workshop should check the applicable technical information after work involving:
- radar or camera removal;
- sensor replacement;
- bumper or grille removal;
- windscreen replacement;
- structural body repair;
- suspension repair;
- steering repair;
- wheel alignment;
- changes affecting ride height.
The key principle is simple:
do not assume calibration is required, and do not assume it is unnecessary.
The requirement should come from diagnosis and the applicable repair procedure.
Why Wheel Alignment and Vehicle Geometry Matter
Some ADAS procedures rely on correctly established vehicle geometry, steering position or chassis reference data.
If the vehicle has:
- incorrect wheel alignment;
- suspension damage;
- subframe movement;
- incorrect thrust angle;
- an off-centre steering wheel;
- abnormal ride height;
then calibration may be based on the wrong reference.
Where necessary, these underlying mechanical conditions should be corrected first.
Ride height can also matter on vehicles with electronically controlled suspension systems. A vehicle sitting outside its intended height may affect the geometry used by some ADAS procedures.
How a Workshop Should Diagnose ADAS Warnings After Repair
A structured post-collision process helps prevent unnecessary parts replacement and repeated calibration attempts.
1. Review the Accident and Repair History
The workshop should identify:
- where the vehicle was hit;
- what parts were removed;
- what panels were repaired;
- whether glass was replaced;
- whether suspension or steering work was carried out;
- whether sensors or brackets were removed.
2. Perform an Electronic Scan
Relevant control modules should be checked for:
- current faults;
- stored faults;
- communication errors;
- calibration status;
- initialization status.
3. Inspect Sensors and Mounting Points
The physical installation matters just as much as electronic communication.
Check:
- brackets;
- mounting surfaces;
- connectors;
- wiring;
- clips;
- sensor orientation;
- signs of collision deformation.
4. Check Alignment and Geometry Where Relevant
Wheel alignment, steering position, suspension condition, ride height and structural geometry may need to be verified before calibration.
5. Check the Applicable Repair Procedure
The correct procedure may specify:
- whether calibration is required;
- what conditions must be met;
- tyre pressure;
- steering position;
- floor condition;
- vehicle loading;
- target position;
- static or dynamic calibration.
6. Calibrate Only When Required
Calibration is part of the repair process, not a substitute for diagnosis.
Static and Dynamic ADAS Calibration
Static calibration is generally performed with the vehicle stationary and positioned relative to specified targets, reflectors or calibration equipment.
Dynamic calibration typically involves driving the vehicle under defined conditions so the system can learn or verify reference data.
Some vehicles may use one method, while others may require both.
The important point for vehicle owners is not which method sounds more advanced. It is whether the correct procedure is being followed for the actual system fitted to the vehicle.
When Is the Repair Actually Complete?
The repair should not be considered complete simply because:
- the bumper looks correct;
- the warning light has disappeared;
- a calibration procedure has been attempted.
A proper final check should confirm that:
- relevant diagnostic faults have been resolved;
- calibration status is correct where required;
- control modules communicate normally;
- affected driver-assistance systems are available;
- the vehicle has passed the required post-repair verification.
This connects body repair, mechanical work and electronic diagnostics into one repair process rather than treating them as separate jobs.
Frequently Asked Questions
1. Does every accident require ADAS calibration?
No. It depends on the systems fitted to the vehicle, the area affected, what components were removed or replaced, and the applicable repair procedure.
2. Does replacing a bumper require radar calibration?
It may. If radar, its mounting bracket or its reference position has been disturbed, the workshop should check whether calibration is specified.
3. Can an ADAS sensor be misaligned without being damaged?
Yes. A sensor may still operate electronically while its physical aiming position has changed.
4. Can I drive with an ADAS warning after accident repair?
The vehicle may still be mechanically driveable, but one or more driver-assistance functions may be unavailable or unreliable. The warning should be diagnosed before assuming those systems are operating normally.
5. Can bumper painting affect ADAS sensors?
Potentially, depending on sensor location and the applicable repair instructions. Some radar systems operate through bumper or grille areas where repair material, refinishing method or component specification may matter.
6. Can a workshop simply clear an ADAS warning light?
Clearing the warning does not diagnose its cause. If the underlying fault remains, the system may continue to operate incorrectly or the warning may return.
7. Can calibration be required without a warning light?
Yes. Some procedures specify calibration because a sensor, camera or reference point has been disturbed even if no warning is displayed.
8. Does wheel alignment affect ADAS calibration?
It can. Some systems use vehicle geometry, steering position or chassis reference data, so alignment may need to be correct before calibration.
9. What is the difference between static and dynamic calibration?
Static calibration usually uses workshop targets or fixtures with the vehicle stationary. Dynamic calibration generally requires driving under specified conditions. The procedure depends on the vehicle and system.
10. Should a sensor be replaced if calibration fails?
Not automatically. Calibration failure can result from incorrect alignment, damaged brackets, unresolved faults, ride-height problems or incorrect setup. The underlying cause should be identified before replacing the sensor.